Two Days at Simon Leach's House

Almost exactly one year ago, I got into a car wtih Jared Flood and Karen Schaupeter, both of whom I had brought on board to photograph and style Simon Leach's Pottery Handbook. We were headed to Simon Leach's house in rural Pennsylvania, and I must admit, we didn't have much of a plan. Many people know Jared Flood as the creator of the yarn line Brooklyn Tweed, but what many don't know is that he is also an amazing painter and a fantastic photographer--a true lover of art and master of light. And for the styling, Karen Schaupeter is our go-to girl, always adaptable, versatile, and loads of fun to have on set. Basically, I had my pottery photoshoot dream team, and we were headed to the countryside to shoot on the fly. We had a one-page shoot list that broke down the book by chapter, and we had a pretty good idea of what we hoped to photograph when we arrived, though we had no idea what would actually be waiting for us when we got there.

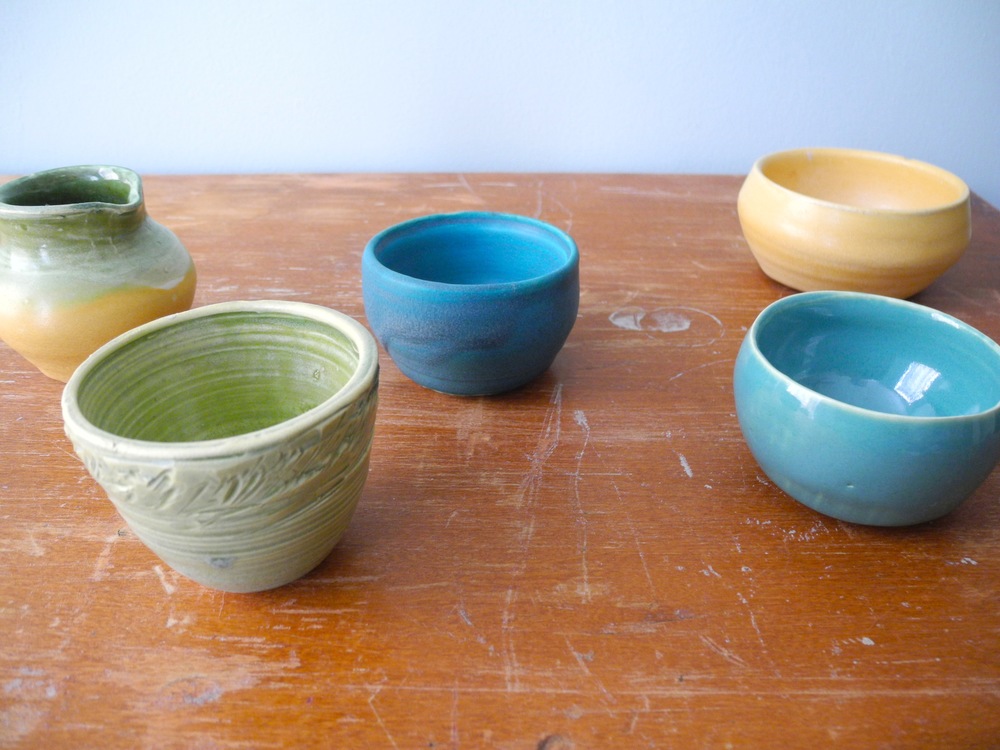
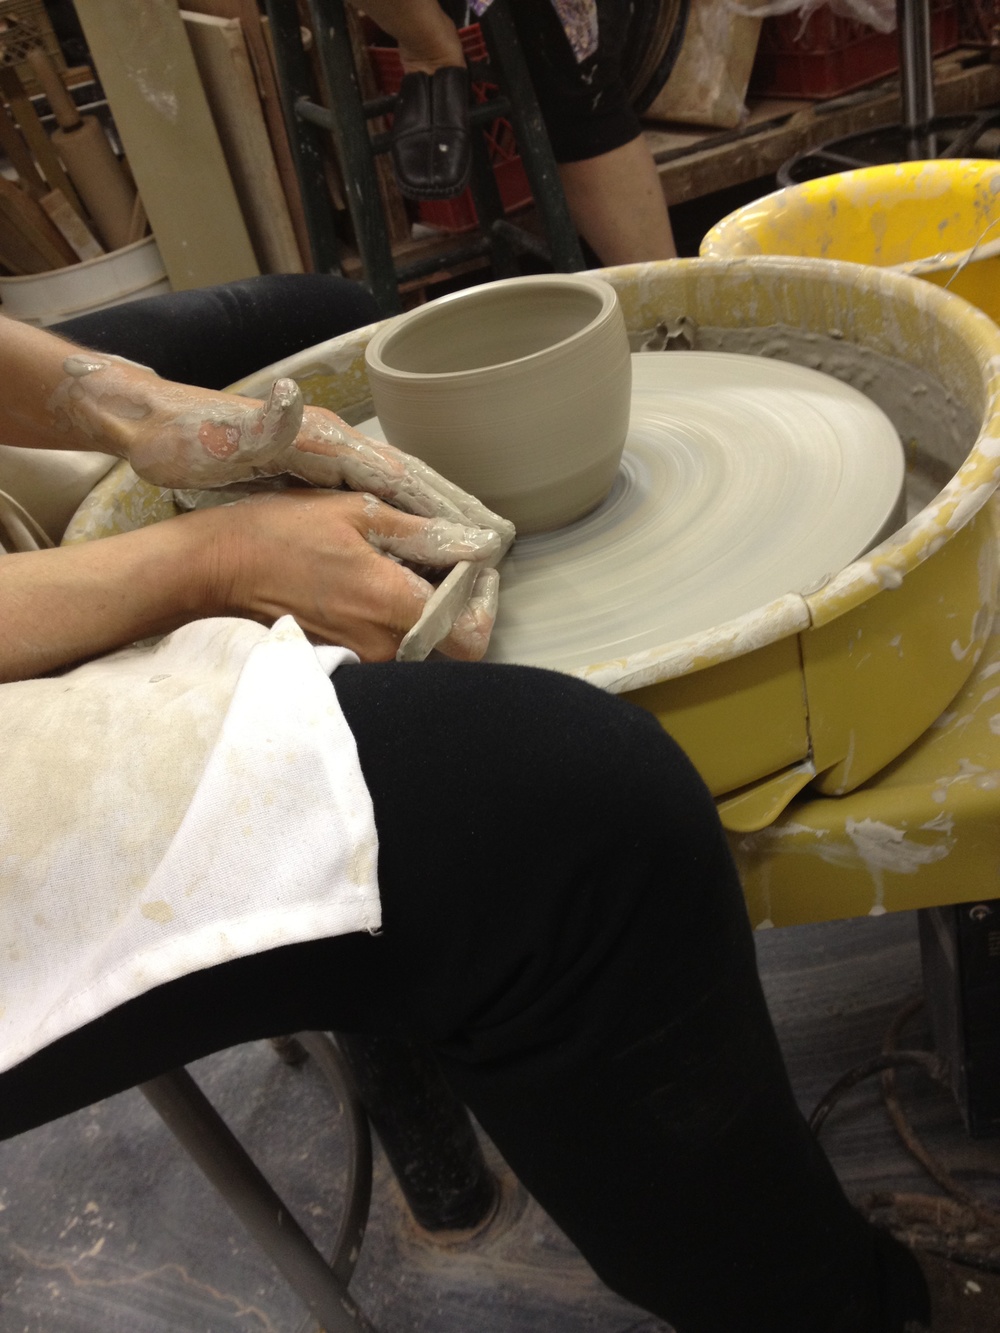
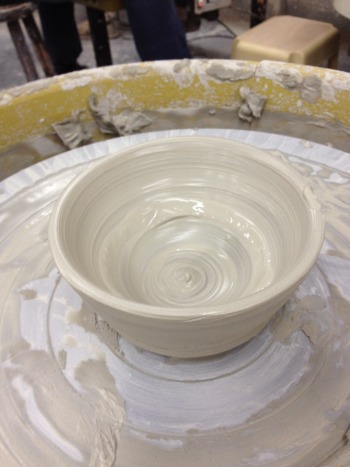
When we pulled up to Simon's house and saw the amazing stonework of the building, the lush green of the hillsides, the decked out studio in his garage, the throwing-wheel set-up on his front porch, and the rows upon rows of ceramics in various stages of completion, we knew it was going to be a fun time.

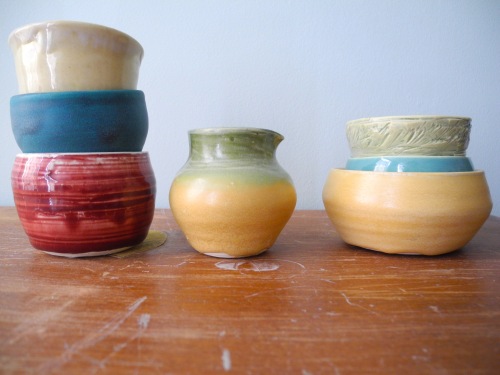
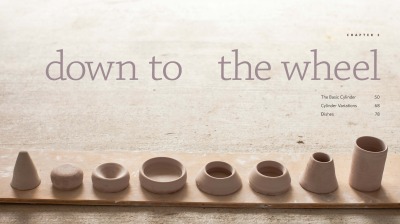
One of the first things to catch my eye when I entered Simon's studio was this set of teaching tools meant to illustrate the eight steps of creating a cylinder. He had them casually set up on a shelf near the wheels, and in just a matter of minutes, Karen had scooped them up and artfully arranged them on a ware board on the floor of the garage to create this stunning chapter opener.

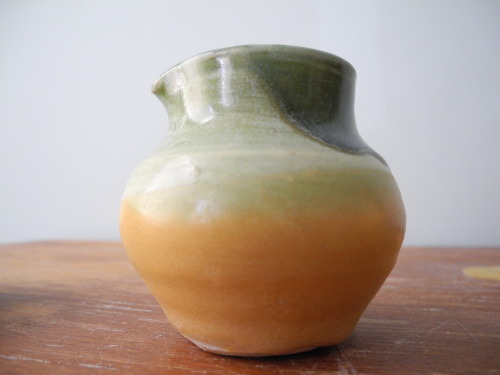
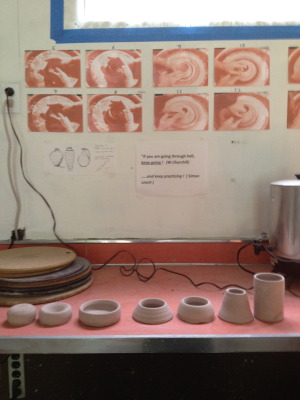
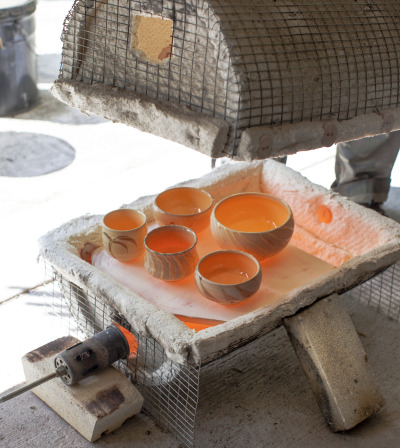
Throughout the day, as Karen consulted with the authors, Simon Leach and Bruce Dehnert, about the objects for the still lifes, Jared roamed around shooting the myriad beautiful items in their organic settings, like this table full of bisque-fired pottery that was sitting by the kiln.

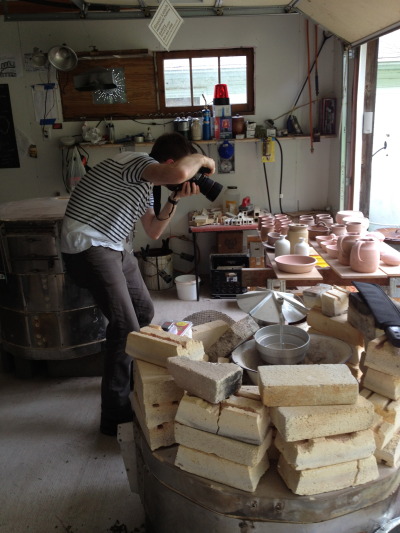
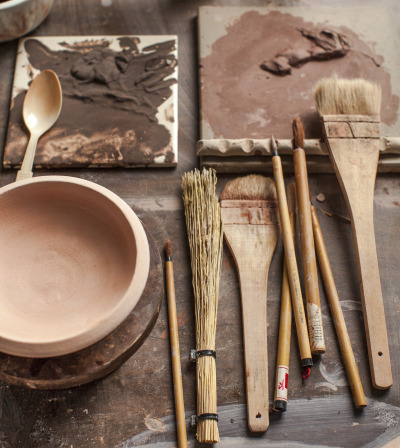
In this photo, Karen works with Simon to set up a still life of tools used to decorate and glaze pots.

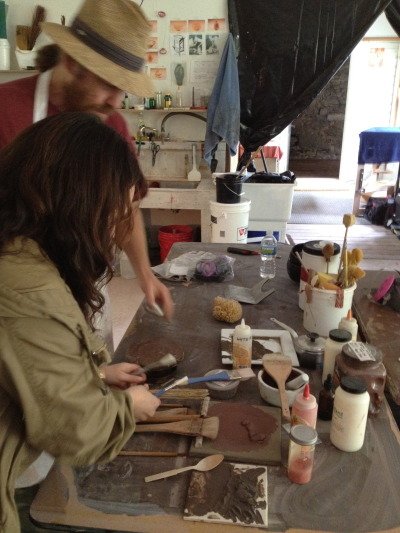
And once they were happy with the arrangement, they called Jared over to weigh in on the framing and snap the shot.

And of course, a trip to a pottery studio wouldn't be complete without a little fire and smoke (or a lot, in this case). At the end of the second day, as Simon removed the scorching hot pots from the raku kiln and dropped them into hay-filled buckets to cool, Jared donned a respirator so he could get in for the tight shots without bursting into a coughing fit.

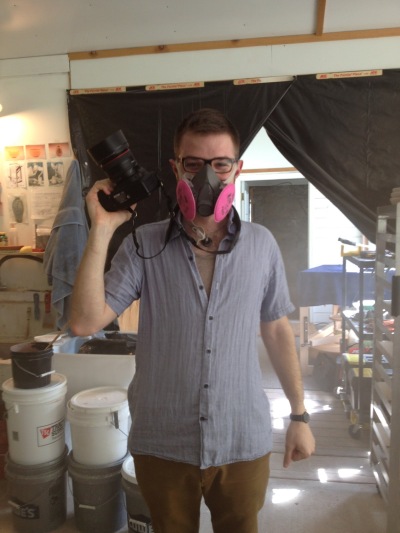
And I would say the resulting dramatic photos were worth it!

One year later, with the book completed, printed, and on sale, it's funny to look back on our process. At the time, it felt like a dizzying amount of planning and organizing, mixed with a big dose of improvisation. But now, when I look at the finished book, it all seems so neat and orderly, so pretty and calm. It reminds me of something Simon said to me when he first saw the designed pages of his book after working on the manuscript for such a long time:

"It reminds me of the analogy of a Persian carpet in the process of being woven. On the top side you see a harmony of patterns being woven, very orderly, very neat, beautifully crafted...on the underside you see a whole load of tangled, knotted loose ends!!  In fact what appears to be total chaos. Clearly you guys have been busy weaving!"

To see more of Jared's fabulous photography from Simon's book, be sure to check out the gallery here.

Pottery Class - Part 2

About two months ago, I left the safety of my orderly desk and ventured into a cermics studio for the first time, determined to learn the craft of turning clay into tableware. It's an art form that I have long admired, but the opportunity to learn how to do it never presented itself...that is, until I started working on Simon Leach's Pottery Handbook (a comprehensive guide for making wheel-thrown pottery, which we're editing now and planning to publish in Spring 2013). Now that I've completed my beginner's course, I can attest to the fact that a lot happens to clay on its way to becoming a pot: After its first spin around the wheel, the pot is deemed a "keeper" or a "do-over." If it's a keeper, then you set the pot under plastic for a few days or a week until it has firmed up and dried out a bit, at which point you put it back on the wheel and trim away excess clay, carving the bottom into a delightful shape. The pot is then bisque-fired in a kiln (which is sort of like prebaking a dough), and then it gets dipped in glaze and fired at super-high heat in a kiln, and this is where the glaze turns to glass, coating your creations in the most fascinating ways.

See how much I've learned?

I must be honest--I didn't know how much I would love seeing the finished product. As you may recall from my first post, as a beginner I was happy just to see the wet clay become a somewhat symmetrical shape. But the first time I saw my clunky little freshly glazed pots, I breathed out a sigh of wonder. Oh, would you look at that glossy finish!, I thought, when I first saw the little blue bowl above. Or, when looking at the bowl below: How fascinating that the turquoise came out so matte, with so much gray and deep navy blue...

My proudest achievement (so far, anyway) has been the little creamer below. When I first threw this pot, I had in mind that it would be a little bud vase, but then I looked at its rim and thought, if I squeezed the clay just so, I could create a spout. (For the record, the act of creating that spout required a fair bit of courage since it was a nice bud vase as it was, and some things really are better left alone.) But now that it's glazed, I can't imagine it any other way.

Admittedly, I seem to have a fetish for finger bowls, and my favored palette appears to be distinctly Mediterranean. I supposed it's a good thing I love olives and roasted almonds, since it looks like I'll be serving a lot of these at my house! And yes, it's true that almost every one of my pots is wonky, but that doesn't bother me too much. In fact, I now look at the ceramics sections in stores and cannot believe that there are potters out there who can throw tableware so consistently. Someday, I think, if I keep practicing, I might be able to do the same. But for now, I'm thrilled that I have challenged myself to learn something new, and I have the good fortune of being taught by and working with some of the best potters in the world as we develop what will truly be an amazing pottery book. And finally, I hope that this post inspires you to try your hand at something new--until you try, you'll never know what exciting, wonderful, and wonky creations will spring forth from your own two hands. What is it that you have always wanted to learn? Please share in the comments section below!

Pottery for Beginners: Liana is at the Wheel!

A few years ago, one of our freelance graphic designers asked me if I had ever heard of the potter Simon Leach. Being a devoted fiber arts nerd, I had never wetted my hands with clay—not even in high school or college art classes—and so naturally I had never heard of Simon. But after she showed me a few of his YouTube videos, I quickly saw why thousands of potters were viewing his basic pottery lessons over and over: Simon Leach is a fantastic pottery teacher.

After roughly a year’s worth of conversations, Simon committed to making a pottery book with us, and we're thrilled that his book is on our Spring 2013 list. Pottery is a brand new category for STC Craft. As many of you know, we started out in 2003 primarily publishing knitting books, and then moved into sewing and quilting. Since then, we’ve branched out into printing, paper crafts, and even terrariums, but a large, comprehensive pottery book is new and exciting territory for us. And because it’s nearly impossible to edit a craft book without first understanding the craft, we decided that I really ought to get my hands dirty and take some pottery lessons

 In most pottery books instructions for throwing pots are broken down into a series of subtle hand movements—the left hand centers the clay on the wheel, the right hand lifts the clay into a cone, the middle and ring finger drill a hole into the center of the cone, and then the fingers pull outward to create walls and open the vessel. For each of these steps, there are accompanying how-to photos, and so—as an editor who had never touched clay before—I felt oddly smug reading through the instructions, thinking well this all makes perfect sense, or well that doesn’t seem so hard. But it wasn’t until I sat down at the wheel that I really understood what it takes to put the practice into action.

My first class was three weeks ago, and I must confess, I am not yet an expert potter. Shocking, I know! Oh, it’s true, I walked into that first class harboring some elaborate dreams that I would be a natural, cranking out perfect, delicate teacups every 15 minutes. But those subtle hand movements were a little trickier to put into practice than they seemed. Despite the initial challenges of my first class, I think you can tell from the photo above that I was having an awfully good time.

Truth be told, as a crafty girl through and through, I love the moment when you really gain respect for a craft. Not to say I didn’t respect pottery before I sat down at the wheel, but I do not think that I appreciated the subtle skill involved, nor did I understand how crucial the role of teacher is in this craft. Without the teacher—whether it’s an in-person instructor, a YouTube video, or a how-to book—we would all be lost!

Each of our classes begins with a demonstration from our instructor, Aimee. Watching an experienced ceramicist throw a pot on the wheel is an absolutely mesmerizing sight. (For that reason alone, you should really go check out Simon Leach’s YouTube videos.) When Aimee does her demo, as shown above, all of the students huddle around her as she expertly guides the clay into the most pleasing shapes, and then uses her throwing stick to trim away the excess clay at the bottom, making a perfectly curved shape. While Aimee's pleasing vessels are the ultimate goal for us aspiring potters, my funky little cylinders and bowls are getting better and better each week. But best of all, my understanding of how to edit the forthcoming Simon Leach’s Pottery Handbook are infinitely improved. As I work my way through this 8-week course, I'll be sure to keep you all up-to-date on my latest creations--be they wonky, cute, or laughable! Ta-Da--one of my first creations!